Your iPhone’s location can say a lot about you. Whether it’s accessing regionally censored content or maintaining privacy, being able to change your digital location offers control and freedom.
While a high-quality VPN like ExpressVPN is the quickest way to switch the location on your iPhone, there are other ways too. Our guide will help you navigate your options, from using a VPN to adjusting your App Store region and iPhone’s GPS settings.
Follow our steps for the simplest ways to change your digital location, so you can stay connected, no matter where you are—or where your iPhone says you are.
Jump to…
How location works on your iPhone
Top 4 benefits of changing your iPhone’s location
Option 1: Change your iPhone location using a VPN
Option 2: Switch your Apple store region
Option 3: Change your GPS location
Option 4: Turn off your location services
How location works on your iPhone
Your iPhone uses a combination of GPS, cell towers, and Wi-Fi networks to pinpoint your exact position. This technology isn’t just about finding you on a map; it’s deeply integrated into various apps to personalize and enhance your experience.
From location-based reminders to geo-tagged photos, your iPhone’s understanding of where you are unlocks a world of functionality. It even adjusts settings like time zones and weather forecasts automatically. However, this convenience also raises privacy concerns, as apps and services can access this data to track you. Fortunately, there are ways for you to manage how your iPhone uses your location and when.
Top 4 benefits of changing your iPhone’s location
People often consider changing their iPhone’s location for a variety of reasons. Whether it’s to maintain privacy from apps and sites curious about your identity, or to explore digital content beyond your regional boundaries, altering your location can offer several advantages. Here are the top five benefits of managing your iPhone’s location settings:
- Enhance privacy: Changing your iPhone’s location can significantly improve your privacy. By altering your location, you can keep your actual whereabouts more private from apps and websites.
- Unlock new content: One of the exciting benefits of changing your location is the access it provides to content censored in your region, such as on YouTube or Spotify.
- Access restricted services: If you’re facing location-based restrictions on certain services or apps, changing your iPhone’s location can help you bypass these limitations, giving you fuller access to these services.
- Save money while shopping: An often overlooked advantage is the potential for cost savings in online shopping. Some e-commerce platforms offer varying prices depending on your location, so by changing your digital whereabouts, you might find better deals and save money.
Option 1: Change your iPhone location using a VPN
One of the most effective ways to change your iPhone’s location is by using a VPN. A VPN allows you to route your internet connection through servers located around the world, effectively changing your location and IP address. This can be particularly useful for enhancing privacy, accessing restricted content, and securing your online activities.
Here’s how you can do it using ExpressVPN:
1. Download ExpressVPN from the App Store
Start by downloading ExpressVPN from the App Store. Look for the iOS VPN to get the official version.

2. Create an account and sign in
Once the app is installed, open it and create a new account. Follow the prompts to sign up, then log in with your new credentials.
3. Grant necessary permissions
When prompted, tap Allow to give the app permission to create VPN configurations on your device. This step is crucial for the VPN to work correctly.
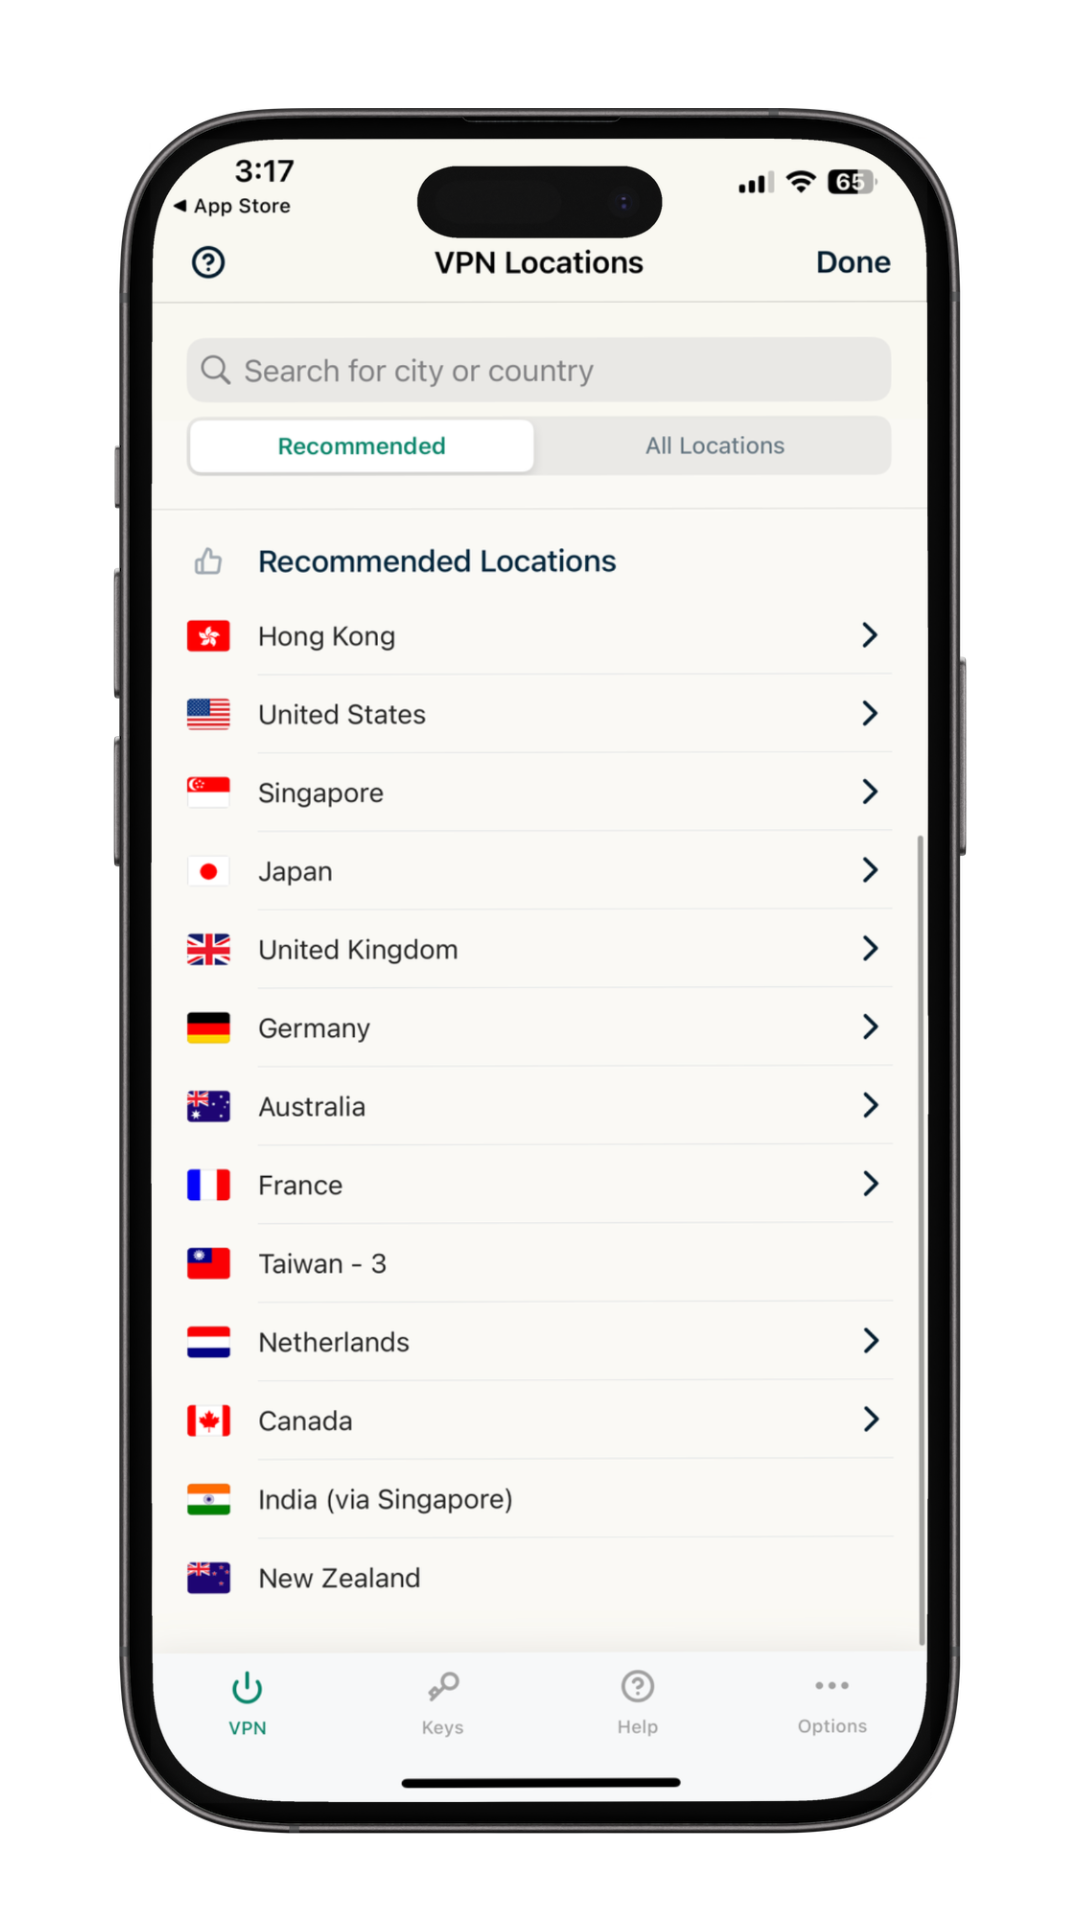
4. Choose a country
In the app, you will see a list of countries you can connect to. Select the country that you want your new location to be in. This could be anywhere in the world, depending on which one of our servers you choose.
5. Establish a VPN connection
After selecting your desired country, tap the connect button to initiate the VPN connection. This will route your internet through the chosen country’s server.

6. Verify your VPN connection
It’s important to ensure your VPN is functioning correctly. First, check your current IP address by using an IP address finder tool or by simply Googling “What’s my IP?” Then, after connecting to a VPN server, re-check your IP address. A change in the IP address indicates that the VPN is active and working.
When a VPN might not be enough to change your location
A VPN will give you a new IP address, which hides your real IP address—this is how a VPN increases your anonymity as you browse the internet. However, there are instances where changing your IP address does not change your iPhone’s location. This usually happens with apps that rely on more than just IP addresses to pinpoint your location. They might use your device’s GPS data or the settings of your Apple Store region to determine your location.
So, even with a VPN, these apps can guess your real location. This is often the case with apps needing accurate location data, like certain navigation, social, or retail apps. If you run into this, you’ve got a few other options.
Option 2: Switch your Apple store region
Sometimes, you might find yourself wanting to download an app that’s not available in your current country or region. Changing your Apple Store region can help you bypass these restrictions.
Whether you’re traveling, moving, or just exploring apps from other countries, here’s how to switch your Apple Store region:
iPhone
- Tap the Settings app on your iPhone.
- Access your Apple ID by tapping on your name at the top.
- Select Media & Purchases and then tap View Account. You might need to enter your Apple ID password.
- Scroll down to Country/Region and tap Change Country or Region.

- Choose a new country or region from the list.
- Read and agree to the Terms and Conditions.
- Update your payment method and billing address if necessary.
- Tap Done to confirm the changes.
iPad
- Start by opening the Settings app.
- Click on your name at the top of the sidebar.
- Tap on iTunes & App Store.
- Click on your Apple ID, then tap View Apple ID.
- Under Account Settings, find and select Country/Region.
- Choose a new country or region.
- Read the Terms and Conditions and agree.
- Provide new billing information if needed.
- Tap Done to finalize your region change.
Changing the region may affect the apps and subscriptions you currently have, and some apps or content might not be available in the new region. Also, ensure your billing information matches the new region to avoid issues.
Option 3: Change your GPS location
There are several reasons you might want to change your iPhone’s GPS location. Maybe you’re looking to access location-specific content in apps or test out apps in different regions. Whatever your reason, it’s quite straightforward to do.
- Choose a reliable third-party app: There are several third-party apps available that can help you change your GPS location. Some popular ones include iTools, Dr.Fone, and iMyFone. Download and install one that suits your needs. (Always read privacy policies before downloading new apps to be aware of how your data might be used or shared.)
- Connect your iPhone to your computer: Use a USB cable to connect your iPhone to your computer. Make sure to unlock your iPhone and tap Trust This Computer if prompted.
- Open the app on your computer: Launch the third-party app you installed earlier.
- Activate the Virtual Location feature: Most of these apps have a Virtual Location or similar feature. Select it from the menu.
- Enter the desired location: You can now enter the address or coordinates of the location you want to appear in, or simply drop a pin on the map provided in the app.
- Confirm and teleport: After selecting your desired location, confirm and apply the changes. Your iPhone’s GPS should now show you as being in the new location.
Only use trusted apps to change your GPS location, as it can affect app functionality and is usually temporary. Ensure you’re complying with app policies and local laws.
Option 4: Turn off your location services
The Location Services on your iPhone use cellular, GPS, Bluetooth, and Wi-Fi networks to determine your device’s location. This feature supports various apps that need your location to function properly, such as maps, weather, and other location-based services. However, if you’re concerned about privacy or want to save battery life, you can opt to turn off Location Services. Here’s how you can do it:
- Tap on the Settings app on your iPhone.
- Scroll down and select Privacy & Security.
- Tap on Location Services at the top of the list.
- Toggle off the Location Services switch. A confirmation message will appear.

- Select Turn Off to confirm. This will disable location services for all apps.
How to disable location services for certain apps
If you want to keep Location Services active but limit it to certain apps, you can easily customize the settings. This allows you to choose which apps have access to your location information.
- Tap the Settings icon on your iPhone.
- Scroll down and select Privacy & Security.
- Tap on Location Services at the top of the menu.
- Scroll through the list of apps that use Location Services.

- Tap on the app you want to adjust. You’ll see options like Never, Ask Next Time, While Using the App, or Always

- Choose the appropriate setting for each app based on your privacy preferences.
FAQ: About your iPhone location
Is it legal to change your location on an iPhone?
Yes. Changing the location on an iPhone—for example, by using a VPN—is legal. However, it’s important to note that while changing the location itself doesn’t break any laws, it can violate Apple’s Terms of Service. For example, you can’t make purchases on the Apple App Store without a valid payment method and address from the region you have set on your device.
Can I disguise my location on an iPhone?
Yes, you can disguise your location on an iPhone. This is commonly done using services like VPNs or location-spoofing apps. These tools allow you to change your apparent location to somewhere else, which can be useful for various purposes, such as accessing location-restricted content or maintaining privacy. However, it’s important to use these tools responsibly and be aware of the terms of service of any apps or services you’re using while your location is disguised.
Will changing my Apple ID region affect anything?
Yes, changing your Apple ID region can affect several aspects of your iPhone usage:
- App Store access: You will only have access to the App Store specific to the new region. This means some apps or content available in your original region may not be available in the new region.
- Purchases and subscriptions: Previous purchases or subscriptions may not transfer to the new region. This includes items like apps, books, films, and music.
- Payment methods: You’ll need to update your payment method to one that is valid in the new region.
- Content restrictions: Different regions have different laws and restrictions regarding digital content, which can affect the availability and type of content you can access.
- Apple media services: Services like Apple Music and Apple TV+ might be affected, as their libraries can vary by region.
Remember, while changing your Apple ID region is allowed, it should be done in compliance with Apple’s Terms of Service.
Will I lose my apps if I change my region?
Changing your Apple ID region can affect your access to apps in several ways:
- App Store access: After changing regions, you will access the App Store of the new region. Some apps available in your previous region may not be available in the new region.
- Re-downloading apps: If an app is not available in the new region’s App Store, you might not be able to re-download it if you delete it or switch devices.
- Updates: Apps that are not available in the new region may not receive updates.
However, apps already installed on your device should generally remain unless they are specifically removed or require updates that are not available in the new region. It’s important to consider these implications before changing your Apple ID region.
Privacy should be a choice. Choose ExpressVPN.
30-day money-back guarantee








Comments
What about Android!?